
How to create a corporate email with Zoho Mail
Introduction
For companies of any size that are on the internet, it is important to have a corporate email with a personalized domain, something like support@mydomain.com.
This type of email is seen as more professional by the company, enhancing trust for clients, suppliers, and others.
In addition, with corporate email, it is possible to separate emails by sectors, such as support, financial, commercial, ensuring that each responsible person receives the correct email.
How to create the corporate email
There are several email providers on the market, such as Google, Microsoft, and others. And Zoho Mail is an option mainly due to its low cost.
Zoho is a large company that has other tools besides email, such as a Password Vault, CRM, Software for technical support, and others, all focused on use by companies.
Because of this, it is a good alternative especially for a company that is starting its digital life.
To create this structure, there are some steps:
- Create an account on Zoho Mail
- Verify domain
- Configure email box
- Configure DNS (MX, SPF, and DKIM)
- Test operation
Create account on Zoho Mail
To create the account, it is ideal to have a domain contracted for your company; in the example here, I will use mydomain.com. If you don't have one, it is possible to purchase a domain through the Zoho panel.
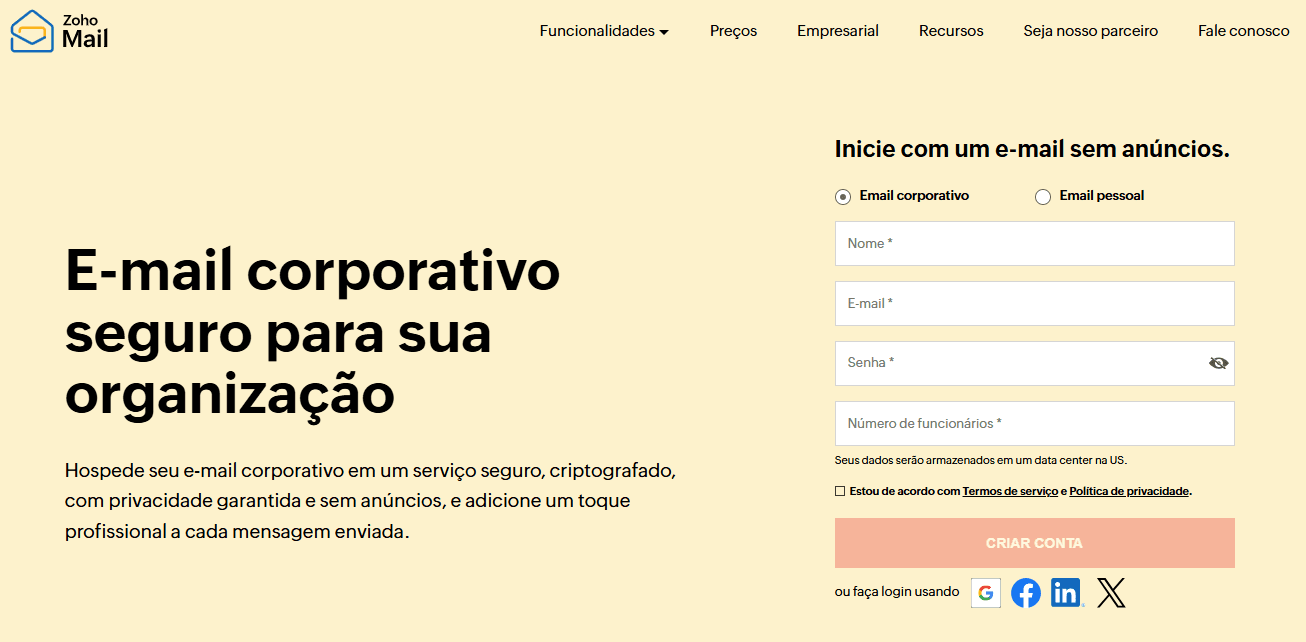
With this, it is possible to access the link https://www.zoho.com/mail/ and on the home screen, you can fill in the form data to create the registration.
After registering, the tool will redirect you inside the platform to perform the initial configurations. In the first step, if you already have the domain registered, select the option that you already have a domain; otherwise, select the option to buy a domain and follow the indicated step-by-step.
By selecting that you already have a domain, proceed by entering your domain information and the company's area of activity.
After that, it is possible to go to the "Go to Admin Console" button without needing to finish the configuration steps for now; it is possible to do this later.
Verify domain
Go to Menu > Domains; the configured domain will already appear with the message "Proof of ownership not yet performed", click on the domain to see the information.
The screen to verify ownership will appear, and to do this, you need to go to the place where the domain was purchased, such as RegistroBR, GoDaddy, among others, or the place where the domain's DNS is being managed, such as Cloudflare.
Inside the provider that is managing your domain, place a new TXT record with the data that is being displayed inside the Zoho panel.
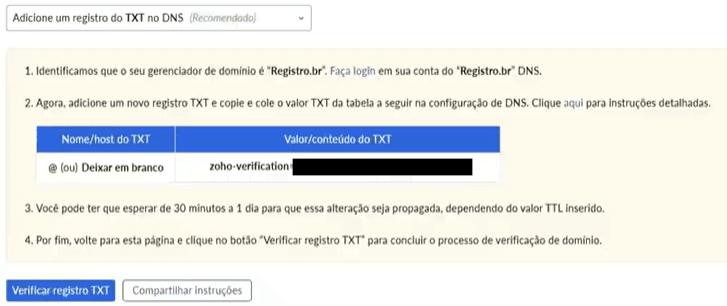
After saving the addition of this new TXT record, go back to the Zoho panel and click the "Verify TXT record" button. This step may take a while; if it doesn't work the first time, wait a bit and verify again. If more than 1 day passes and it hasn't worked, then it's worth checking if the configurations were done correctly.
Configure email box
After verifying ownership, Zoho will direct you to the screen to create the first email box.
Important: this email will be the super administrator of the account. I recommend leaving this first email for personal use, with your first and last name, and creating the emails by company sector or other email boxes you want later.
After configuring this box, the next step is to configure email groups, but it is not necessary to do it now; you can skip to the next item.
Configure DNS (MX, SPF, and DKIM)
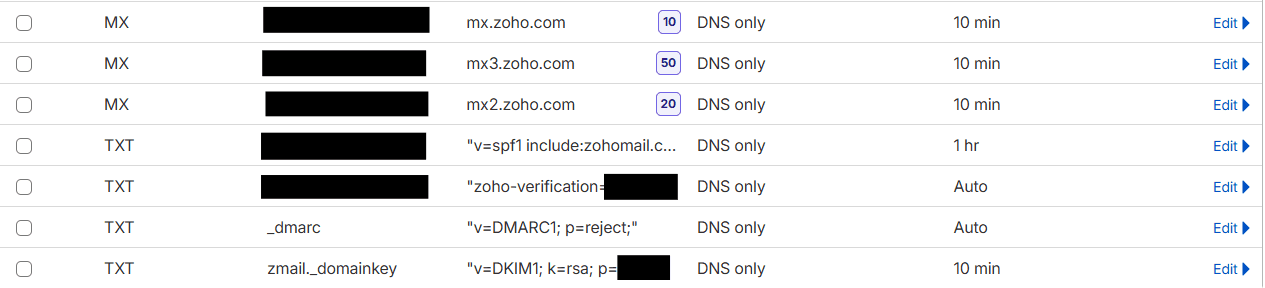
The next step will be to configure the DNS mappings, basically to tell your provider that Zoho and its servers will handle the sending of emails.
This screen will indicate the records that need to be created in the provider that is managing your domain.

For each of these items pointed out in the image, create the corresponding records within your provider, the MX and TXT records. In Cloudflare, for example, it looks like this:
With this, the email is already configured to send and receive emails, but this configuration can take a while to apply everything and work correctly, up to about 5 hours.
Test operation
To test, it is possible to access the email box from within the Zoho panel; in the upper right corner there is a house icon, when hovering the mouse over it, the tooltip "Go to Zoho Mail home page" appears, or by accessing the link https://mail.zoho.com/zm/#mail/folder/inbox.
Inside the inbox, it is possible to write a new email to a recipient; put some other email of yours, with some message, and send it; check your email to see if it arrived.
And do the same for the reverse: send an email from another account of yours to the email you just created and see if it arrives.
It is also possible to use a verification tool such as https://www.mail-tester.com.
This tool creates a recipient email for you to send a message to; after sending, you can click the "Check your score" button, and the tool will show you a score, indicating if everything is configured correctly. If it isn't, check which item was missing the configuration.
If something was missing, such as MX, DKIM, SPF, you can go to Domains > Click on the domain > Email settings, and access the corresponding option to perform the individual configuration.
Conclusion
With these steps, it is possible to perform the configuration of a corporate email; currently, the Zoho Mail account created this way is free for up to 5 accounts.
The configurations require attention to set up, because if something is wrong, it can take time to see why, as usually the propagation of this type of configuration takes a while. Analyze well if all information is correct before saving.
If you have any suggestions for improvement in this article, contact me on LinkedIn :)